Introduction
Being interested in cybersecurity, I’ve always found it useful to intercept (man-in-the-middle) device traffic to see exactly what it’s communicating with—and sometimes what it’s sending.
After recently switching to Android and buying a Xiaomi Mi 8, I wanted to inspect the network traffic generated by apps on the device.
There are several tools available for this, but in this guide I’ll be using the Community Edition of :contentReference[oaicite:0]{index=0}.
This post walks through setting up interception so you can view and modify traffic from an Android device (:contentReference[oaicite:1]{index=1}).
Note: This is for personal research on my own devices and network. You should never intercept traffic from devices you don’t own or have explicit permission to test.

Starting Burp Suite
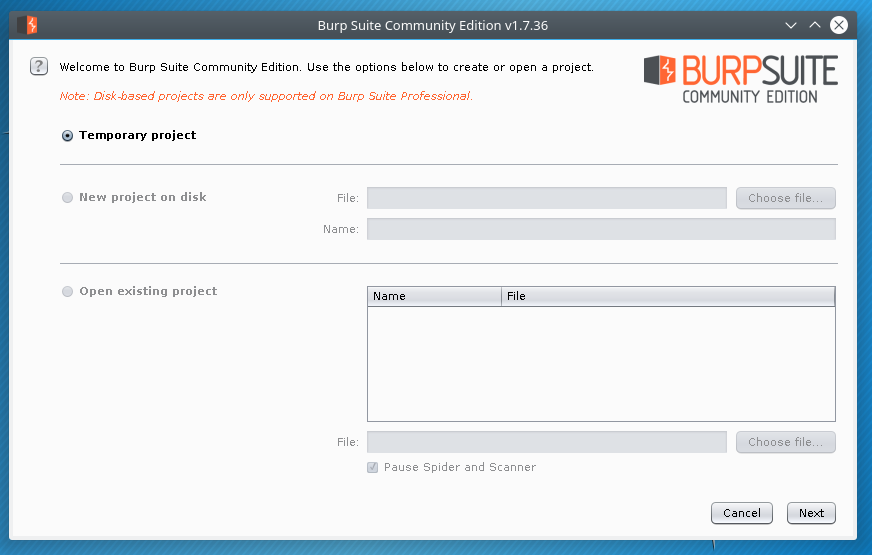
Launch Burp Suite. If you’re new to it, when prompted:
- Click OK
- Select Temporary Project (or save to disk if preferred)
- Choose Use Burp Defaults
- Click Start Burp
Configuring the Proxy Listener
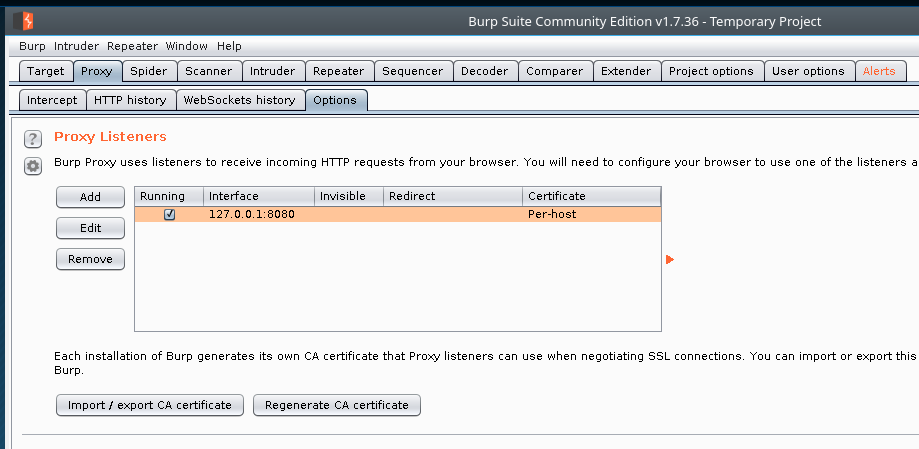
Next, we need to configure Burp’s proxy listener so your phone can connect over Wi-Fi.
- Go to the Proxy tab
- Open the Options sub-tab
- Locate the Proxy Listeners section
By default, Burp listens only on localhost, which won’t work for a mobile device.
Bind to All Interfaces
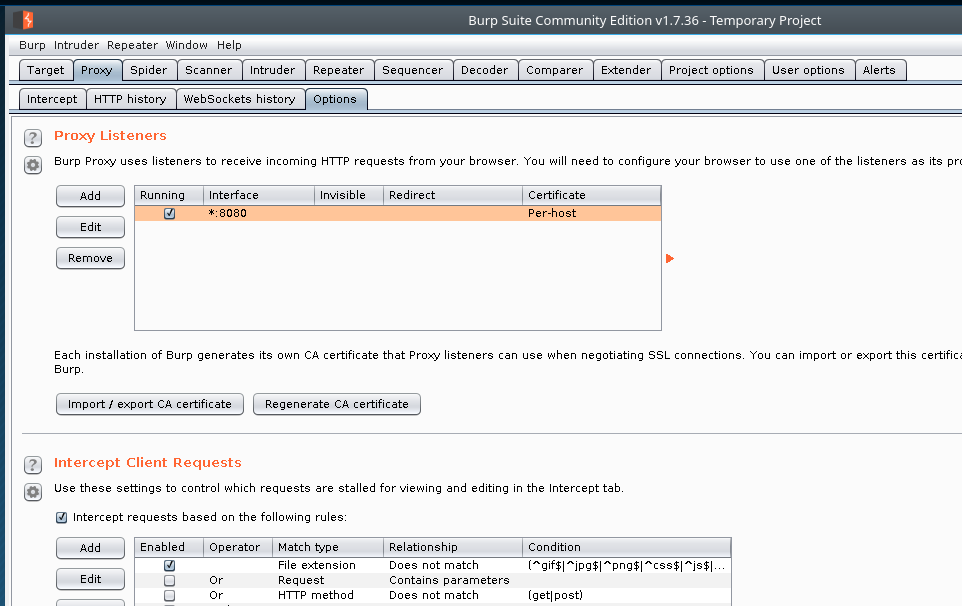
Click Edit on the listener and set:
- Bind to address:
All interfaces
This allows devices on your network to connect to Burp.
After applying, you should see the listener bound to * instead of 127.0.0.1.
Configuring Android Proxy Settings
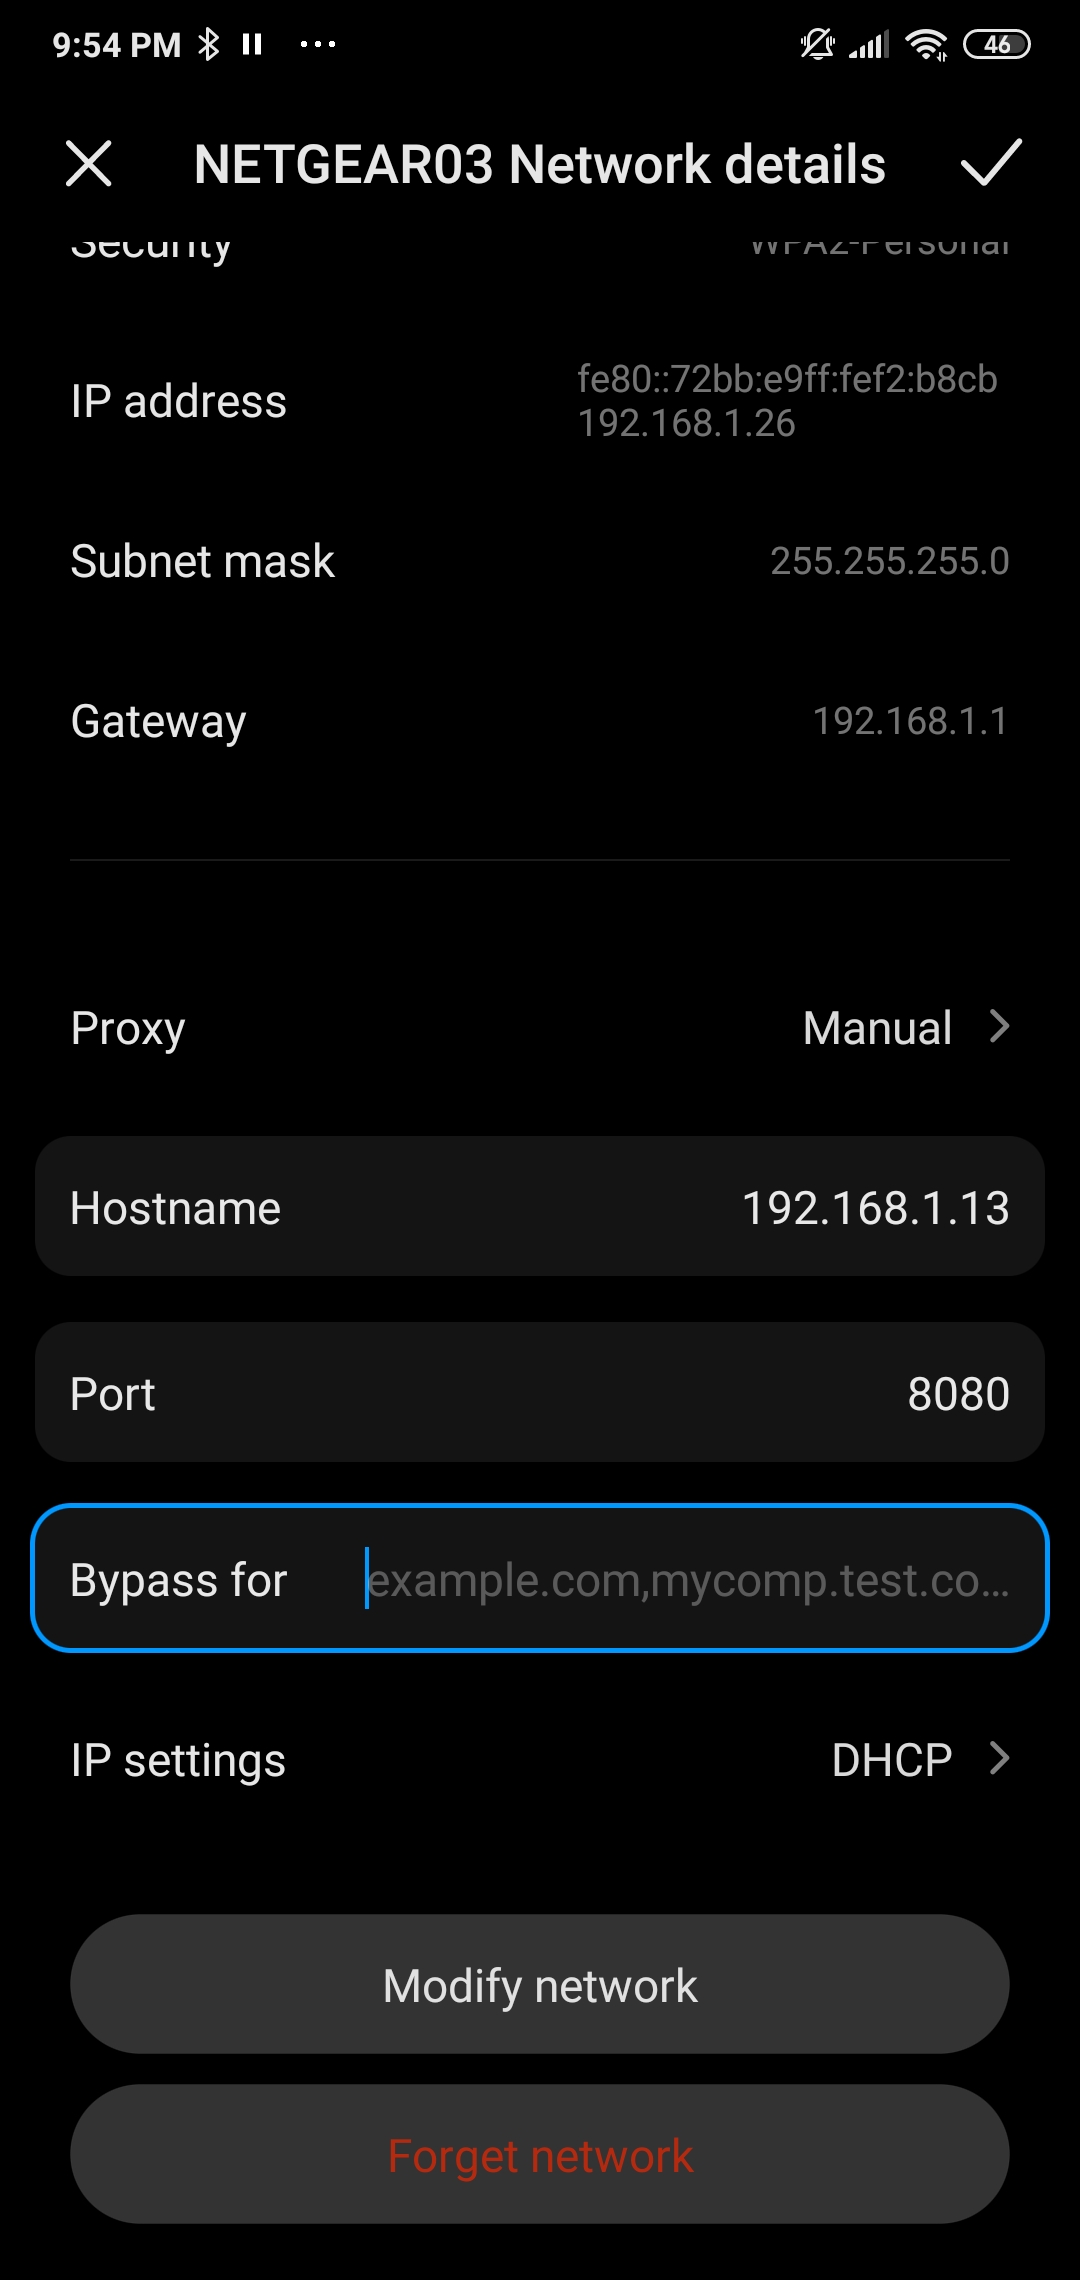
On your Android device:
- Open Wi-Fi settings
- Long-press your connected network
- Choose Modify network
- Set Proxy to Manual
- Enter:
- Proxy hostname: IP address of your computer (run
ifconfigoripconfig) - Proxy port:
8080
- Proxy hostname: IP address of your computer (run
Save the settings.
Installing the Burp Certificate
At this point, traffic may fail because Android does not trust Burp’s SSL certificate by default.
To fix this:
-
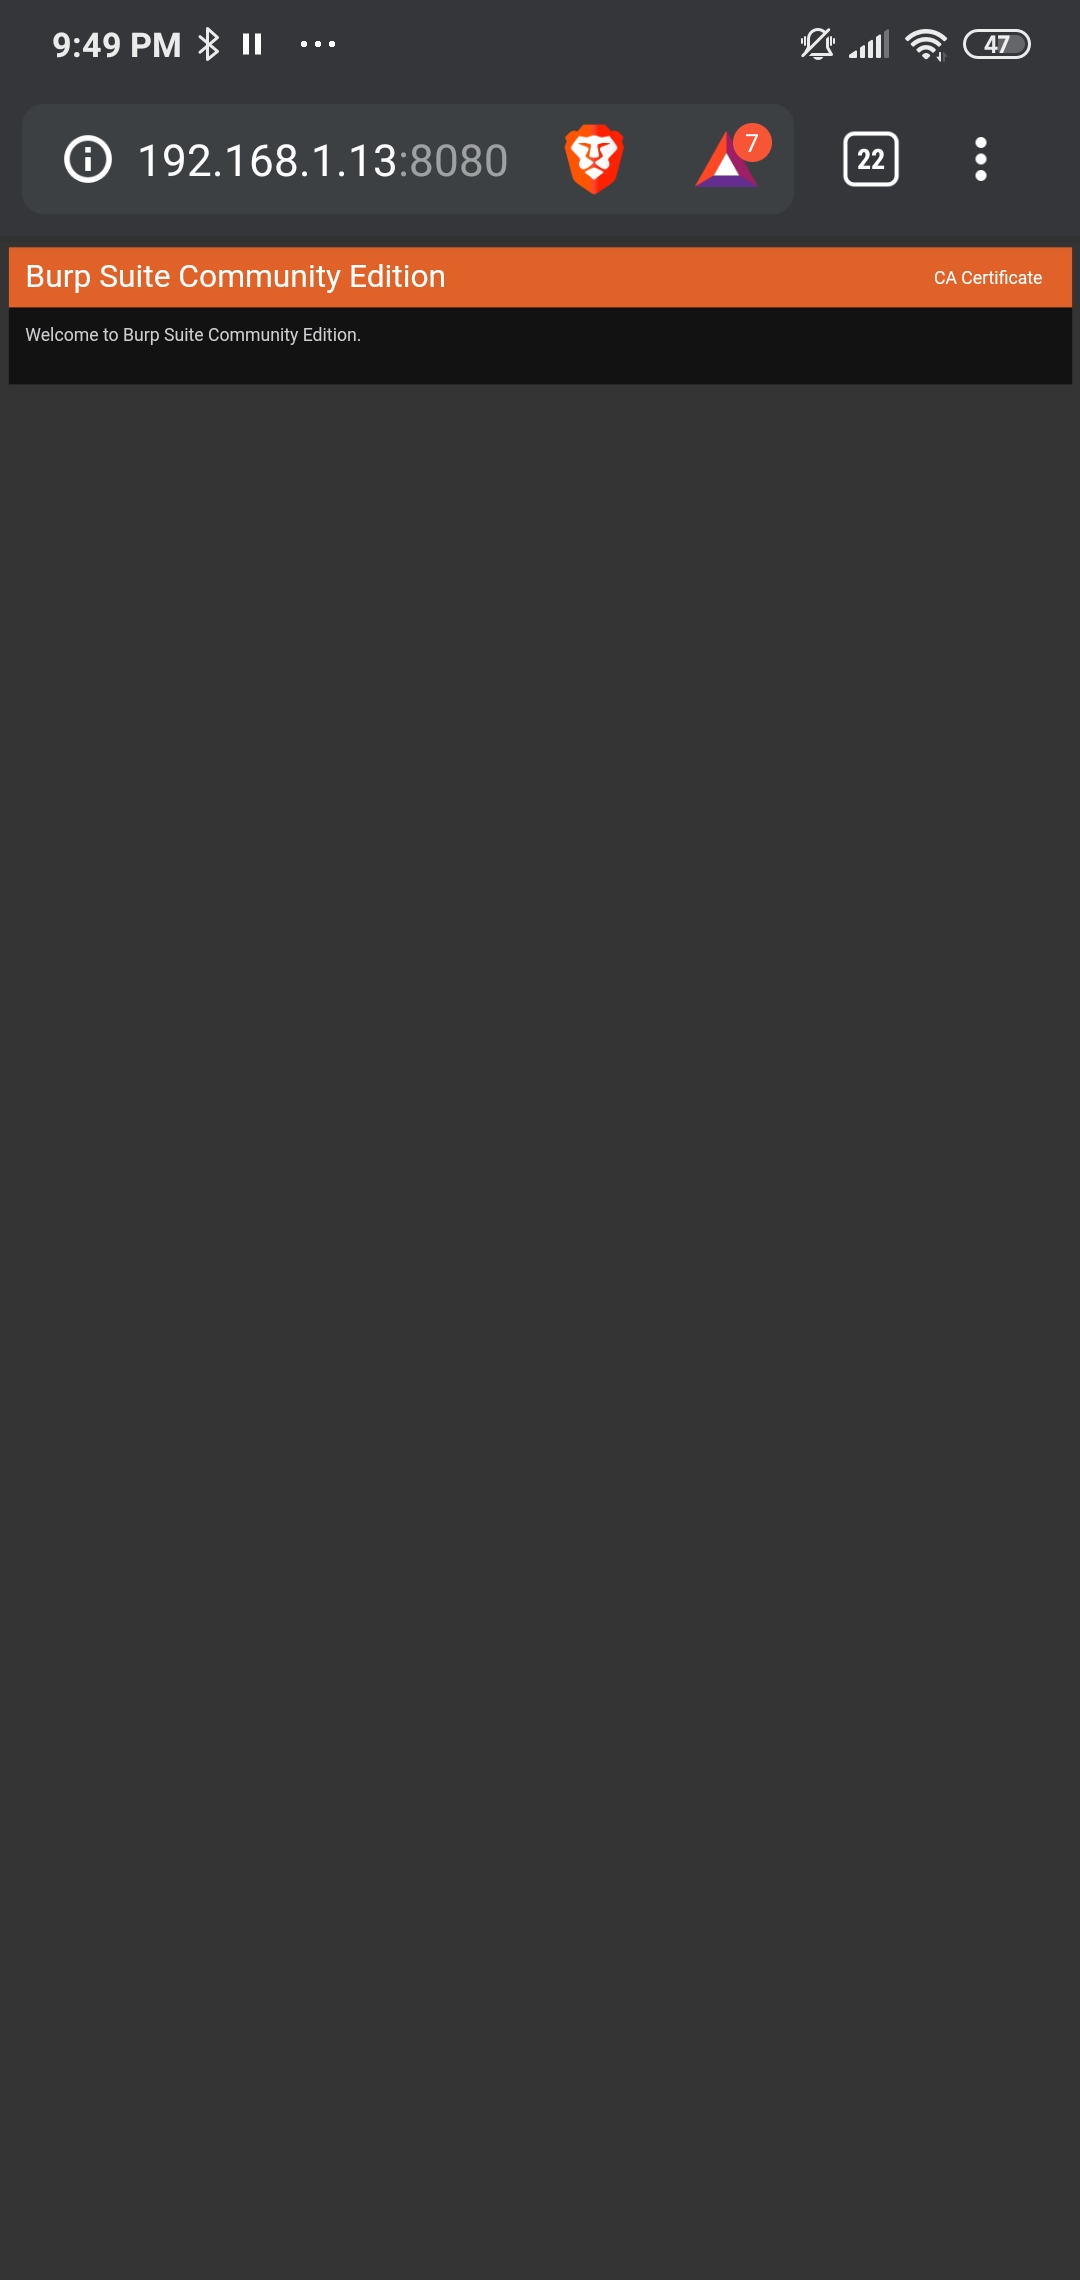
On the Android device, open a browser and visit the proxy address:
http://<your-ip>:8080 - Click CA Certificate
- Download the
cert.derfile - Rename it to
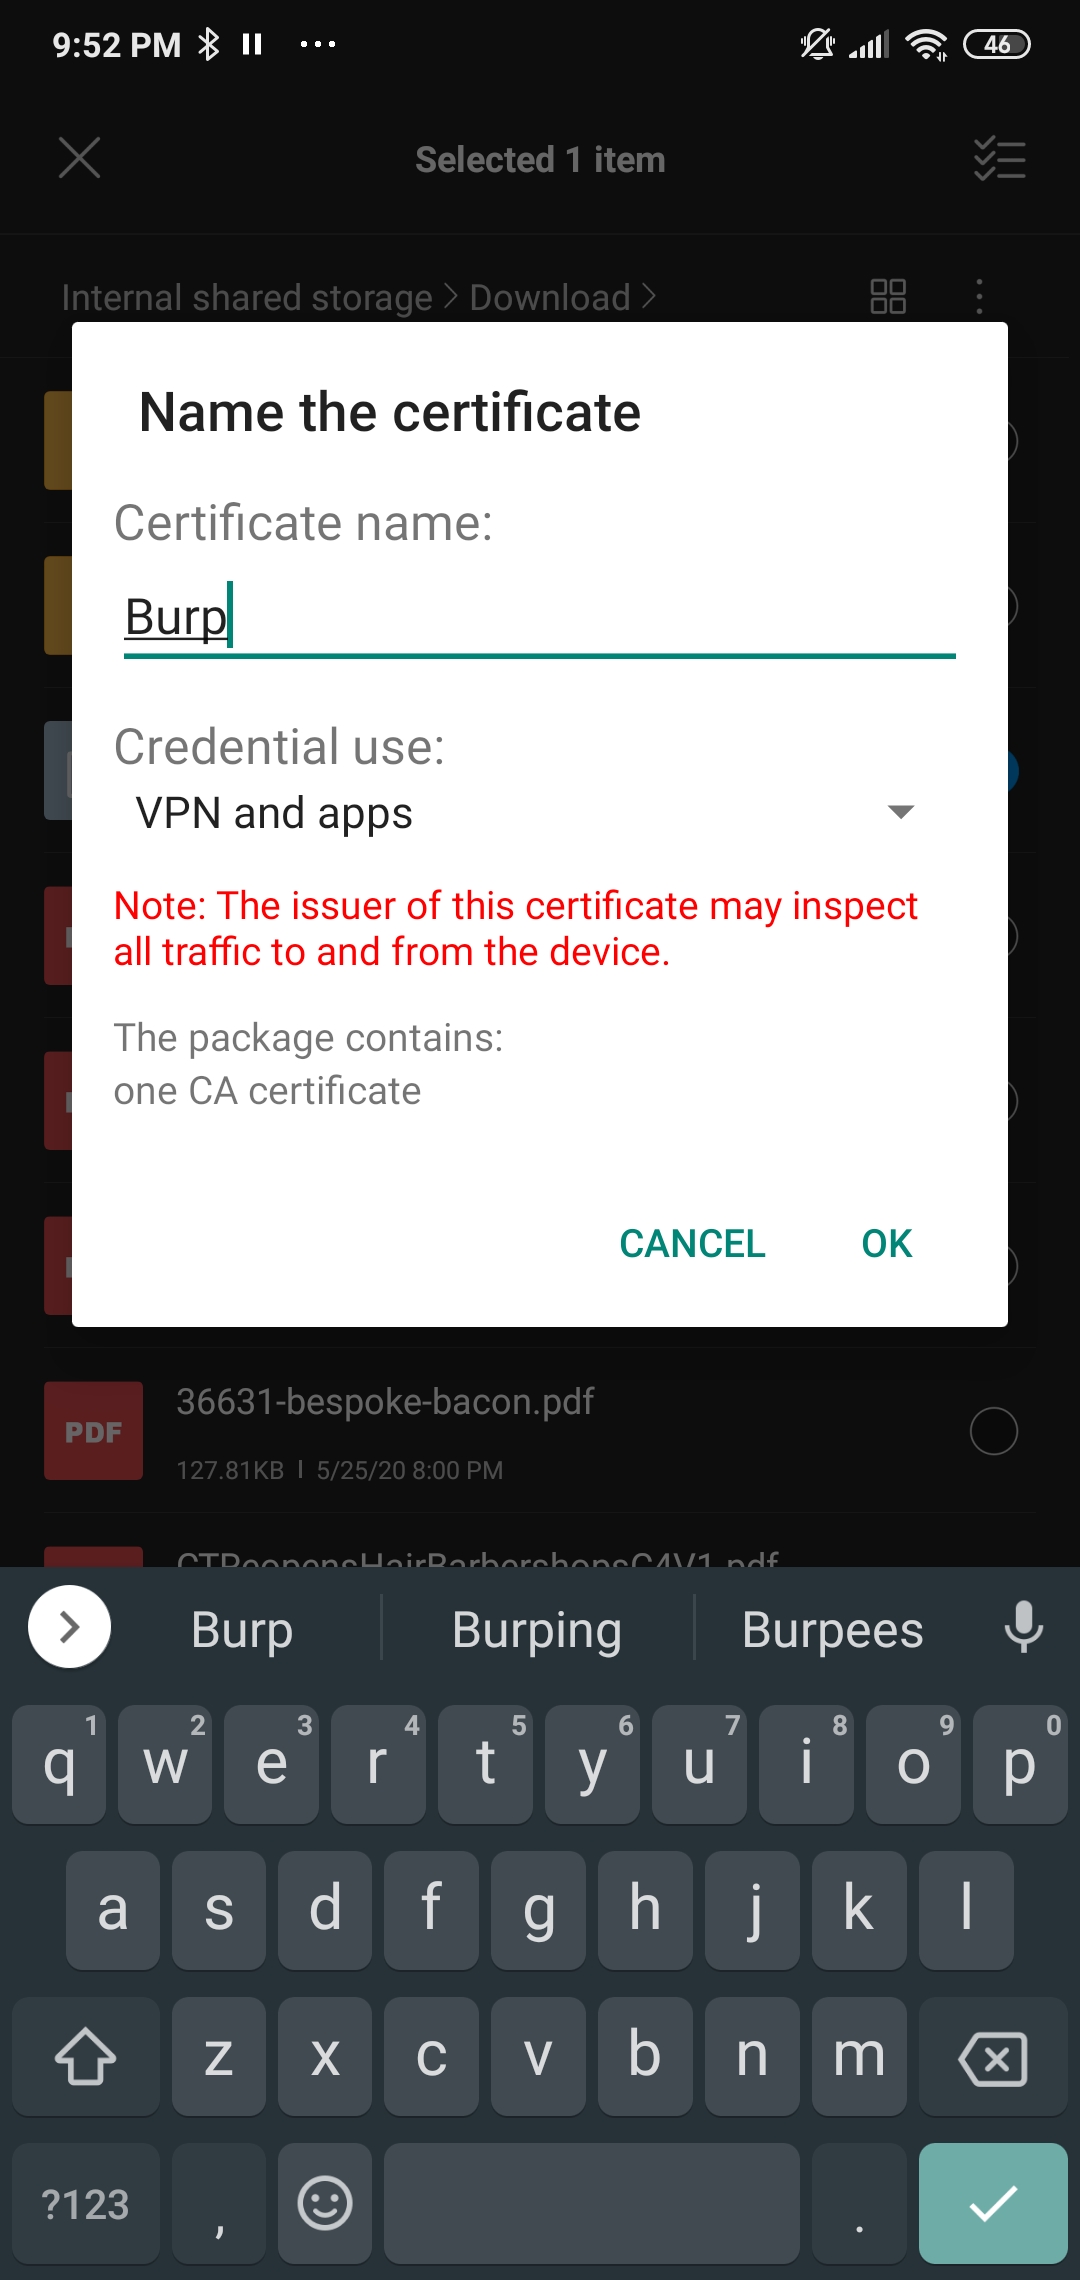
cert.cer - Open the file and install it as a trusted certificate
Capturing Traffic
Once the proxy and certificate are configured, browsing on the device should begin routing through Burp.
In Burp Suite:
- Go to Proxy → Intercept to view live requests
- Use Forward to allow requests through
- Use Drop to block them
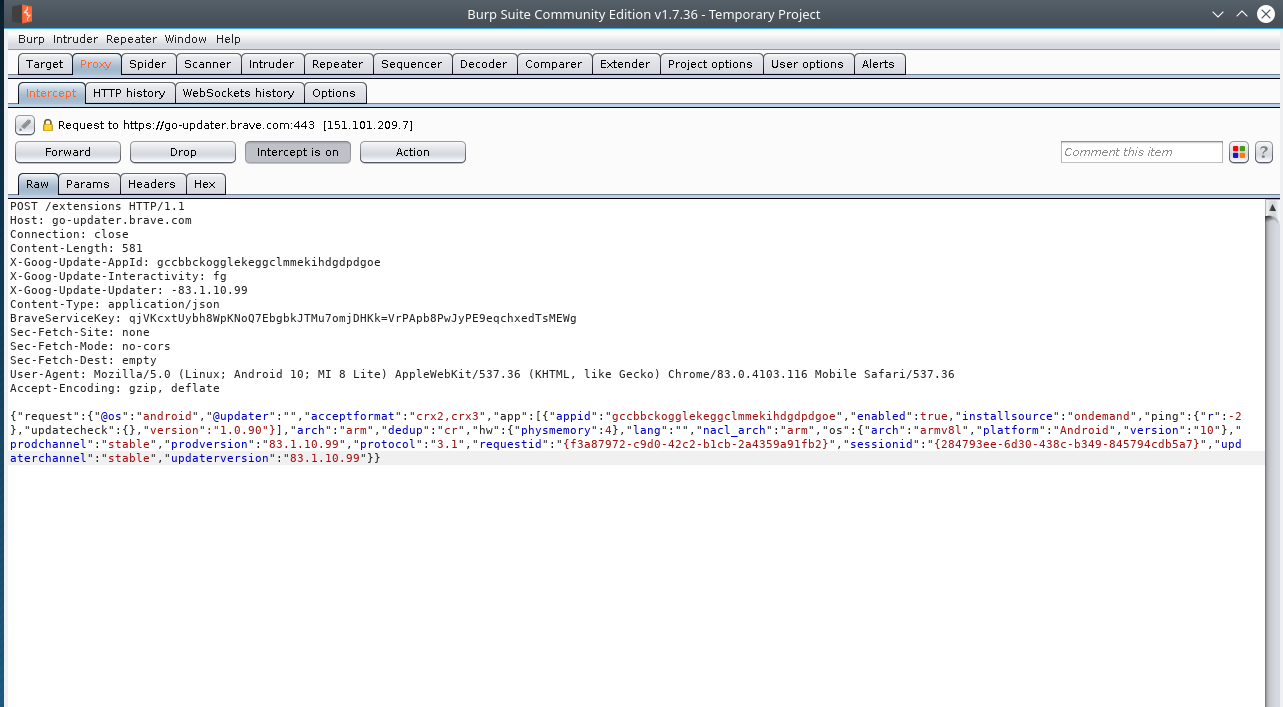
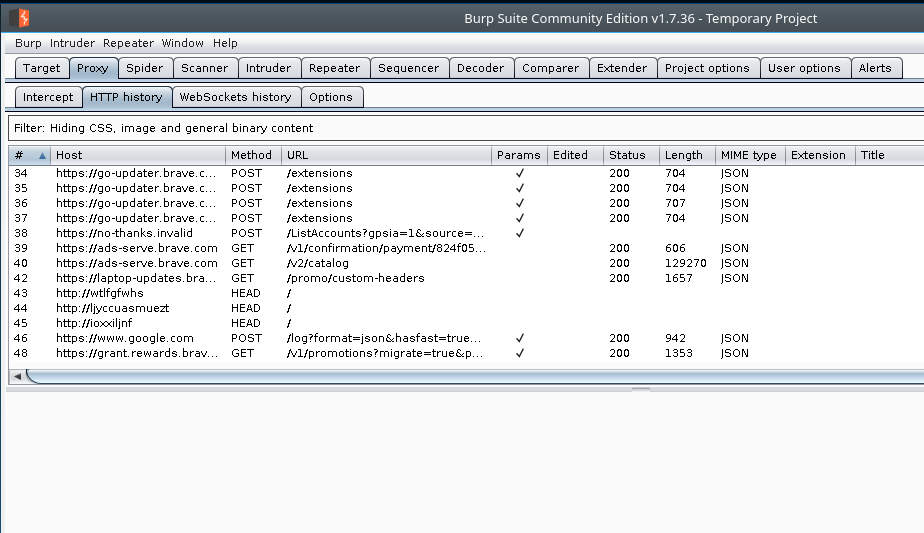
You can also review all captured traffic under:
Proxy → HTTP History
This allows you to inspect, resend, or modify requests.
Final Result
Once requests are forwarded, the page will load normally, and you’ll be able to see full request/response data inside Burp.
Cleanup
When you’re finished:
- Remove the proxy settings from the Android device
- Delete the installed CA certificate if it’s no longer needed
Conclusion
At this point, you’re successfully intercepting and inspecting Android device traffic through Burp Suite. This setup is extremely useful for learning how mobile apps communicate over the network and for general security testing in controlled environments.